Water System Winterization
Sep 27, 2024Depending on the year, Revels and for that matter almost any Sprinter based adventure van come equipped with a water system that stores and delivers water via a tank and plumbing system with hot and cold running water. It’s an awesome convenience versus truck and tent camping with a jerry can of water for all uses.
That said, this additional convenience does come with some tradeoffs in terms of ease of maintenance. One of the main areas of required maintenance to avoid surprise leaks in the spring is winterization in freezing climates. The online requests for help with leaky plumbing consistently go up after the winter.
I will not detail the exact processes for the various vans, as they can be found in the Winnebago or other van owner documentation (with the exception of using air on the older Revels). The basic processes and what tools to use are similar for all years and many van conversions. There are two main procedures that can be used separately or combined, blowing out the system with air and/or filling the lines with RV antifreeze.
Using compressed air (Blow Out Procedure)
The advantage of using compressed air is that if you decide to use the van after winterizing, you can simply fill it up and go without the need to flush out antifreeze chemicals. The potential drawback is that if not done well or if there is a low spot that is not cleared by the air a harsh freeze could still damage plumbing.
Since at least the 2022 Model Winnebago has included the procedure to use compressed air for winterization in the Revel Manual. This was not included in the manual for first generation vans (2020 and earlier Revels with external water tanks), but many, including myself do so successfully.
Since the 2020 and older vans a blowout process is not documented in the manual I will outline it here:
- Drain the water tank via the plug on the bottom, it’s a 1 inch square plumbers plug. You can get a special tool to fit that exactly, but either a 1 inch 8 point or a 1 3/16 inch 12 point socket work great. They can be found on Amazon or hardware stores.
- Remove any carbon filter you have installed and install the bypass plug for the housing (optional, these are a great add if you drink out of your tank)
- Put the plug back in the tank after draining and connect a regulated 30psi air source to the city water connection on the driver side of the van using an adaptor (see “Tools” below for recommendations).
- Starting at the rear shower open both hot and cold taps separately and close after only air is coming out. After the rear shower, I do the external hose by the door and then the shower, toilet and sink.
- Open the low point drain and close after air only is escaping
- Empty the gray tank and close the valve after empty
- Finally (optional) poor a bit of pink RV antifreeze down the sink and shower drain. This will provide protection for those drains as well as for the gray tank drain valve if you pour a generous enough amount (at least a gallon).
The blow out process for the 2021 to 2024 Revel with the internal water tank and the water control panel located at the back of the van can be found here (WGO owner’s manual) on page 6-9 ➔ HERE
The 2025 Revel has a similar procedure for its new water control panel and larger internal tank that can be found on page 6-11 of the 2025 owner’s manual that can be found here ➔ HERE
Tools
For all model years the tools to do the blow out procedure will be the same other than the drain plug removal socket mentioned above for the older vans.
A regulated (where you can adjust the maximum output pressure) air compressor is a must. WGO recommends 30 psi or less. I find between 20 and 30 to be plenty to evacuate the lines. Over pressurizing the system could damage fittings or lines. An inexpensive one-gallon compressor works great. I would not recommend going much smaller in tank size or using a tankless compressor as the volume of air is helpful to get good evacuation of the water in the lines.
Typical one gallon compressor (this one is $149 on Amazon)

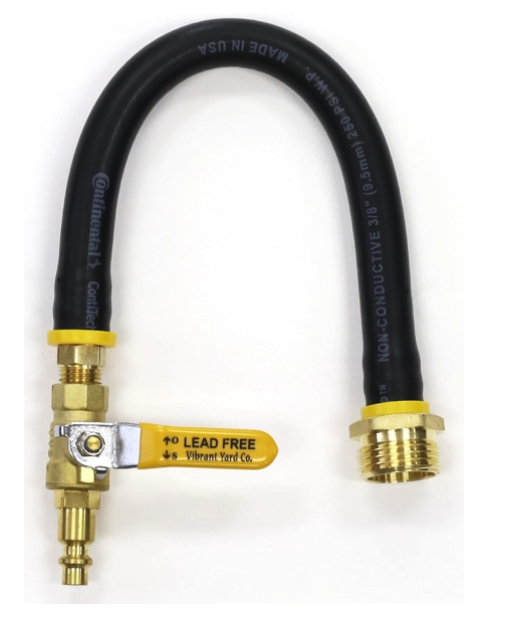
An air hose to faucet connection adapter is needed to connect the 30 PSI air source to the water system. One with a valve is best. Having the valve closed when connecting / and to disconnect is helpful. Open the valve slowly when connecting to reduce shock to the plumbing as you would opening a water valve when filling from city water.
Typical adaptor
RV Antifreeze procedure
The process to use RV antifreeze is documented in the user manuals for all years (links below). For each, the process is essentially to empty the system of water and add RV antifreeze via a winterization valve or panel setting and run the fixtures until RV antifreeze only comes from the outlet.
Using RV antifreeze will be more robust in terms of protection than using a blow out procedure only. The drawback is that the system needs to be well flushed before using the van the next time. Whether to use antifreeze is a choice dependent on how harsh of winter weather your van will be stored in and how often you may want to take it out of storage and use the water system in the cold season.
2020 and older Revels, page 6-9 ➔ HERE
2021-2024 Revels, page 6-13 ➔ HERE
2025 Revels
The 2025 Revel manual recommends using antifreeze after blowing out the system. The process is on page 6-15 ➔ HERE
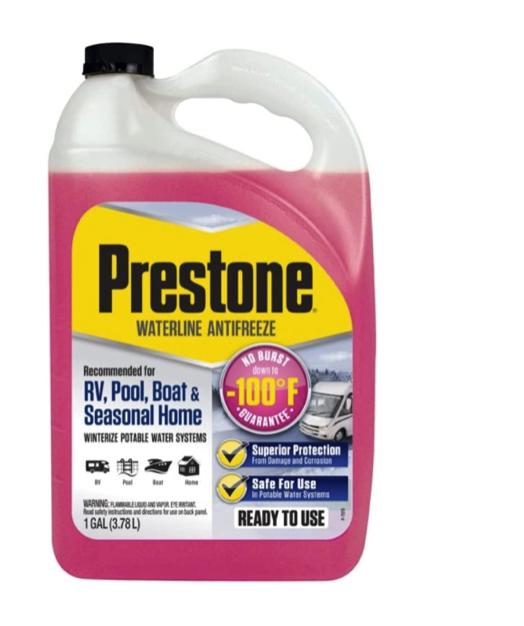
RV antifreeze is readily available at many big box stores, marine stores and outdoor equipment sellers, and of course Amazon. Stronger (-100F) versions provide some extra protection when diluted by some water that may remain after draining/purging the system.
*Affiliate links for tools
Socket to remove tank plug on 2020 and older Revels
Air to hose adaptor (Blow out for all years)
One gallon compressor with regulator for blow out procedure
RV antifreeze (-100F)
Author: Mike Faber, Expert Revel Guide
The REVEL CLUB and Yellow Dog Van Adventures
SIGN UP TO HEAR MORE ABOUT OUR UPCOMING TRIPS AND TRAININGS, GEAR, DISCOUNTS & MORE!
We hate SPAM. We will never sell your information, for any reason.